























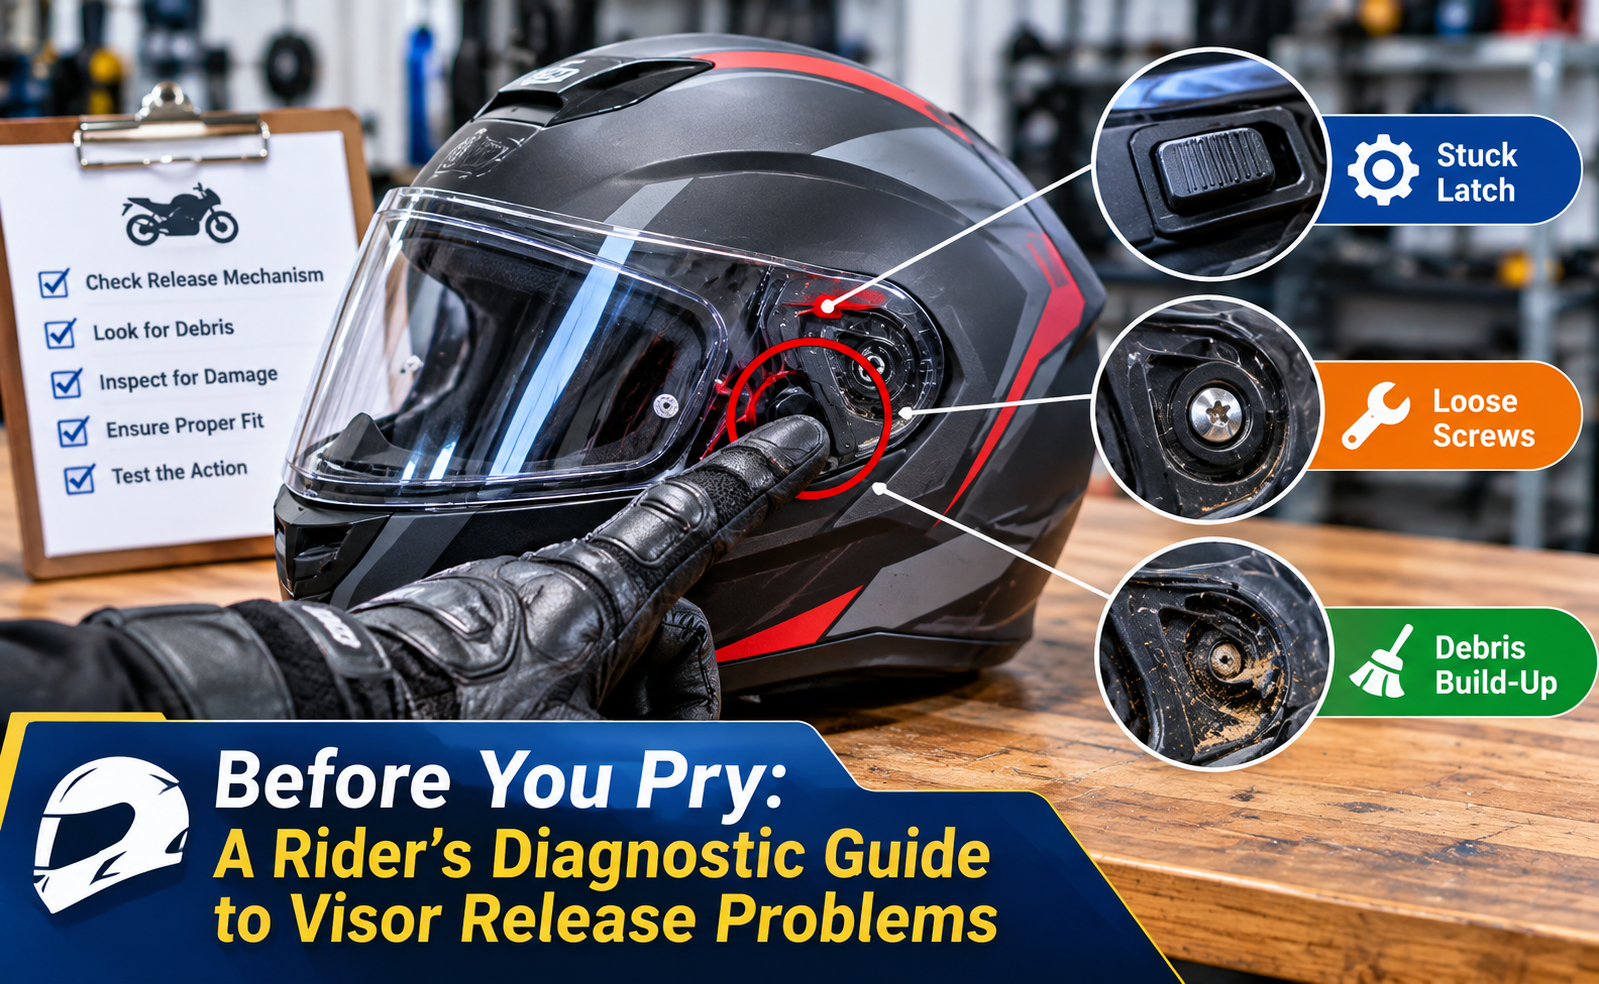
You flip the visor fully up, grip the edge, and pull. Nothing. So you pull a little harder, and the plastic flexes in a way that makes your stomach drop. It’s the moment most visor damage begins: the resistance feels like a stubborn part, so strength seems like the answer.
Resistance usually means something else. On most helmets, the catch lets go only when the visor is fully open, and a hard pull is a sign the release hasn’t actually disengaged. Modern road helmet visors are designed to come off by hand, without tools and without force. The trouble is that each manufacturer hides the release in a slightly different place.
The fix is diagnosis, not muscle. Read what the mechanism is doing first, then act.
Read the Hardware First: What Your Helmet’s Release Is Telling You
Four release designs cover most road helmets, and each fails in its own way. Knowing which one you have tells you what to watch for before your fingers go near the plastic.
A sprung lever on the side plate is the hallmark of a quick release helmet shield mechanism. The lever pulls back or down while the visor is fully open, and it must stay held for the whole swing, not just the start. Let go early and the catch re-engages, which feels exactly like a stuck visor.
Ratchet-and-cam designs behave differently. The visor lifts past its last detent, then slides forward off the cam. Force it past that detent before it is fully open and you risk snapping the cam tooth.
Screw-fixed helmets use a single screw per side. On a screw-fixed helmet visor pivot plate system, the plate itself comes off with the visor, so the hazard is small hardware. The captive washer behind the plate is easy to lose.
Sliding tabs free the pivot when pushed toward the rear of the helmet. Treat these gently, because tabs go brittle with age and road salt.
The practical split is this: lever and cam designs release a catch, while plate designs release a fastener. If you cannot tell which you have, check your helmet’s manual before experimenting. Release locations vary by manufacturer.
Resistance Troubleshooting: Three Symptoms, Three Checks
Any stuck motorcycle visor mechanism fix starts with confirming the visor is fully open and the catch is truly released. Most catches disengage only at full opening, so a visor that resists is usually telling you the release has not happened yet. Match what you feel to one of three causes.
The visor isn’t fully open. If it stops short of its highest position, the catch may still be seated. Raise it to the very top before you try anything else.
The catch isn’t held through the swing. On a lever design, letting go partway lets the catch re-seat. The lever needs to stay held open for the whole motion, not just the first inch. If you need a third hand, you are probably fighting the design.
You’ve pushed past a detent. On ratchet and cam designs, the visor should lift past its last detent and then slide forward off the cam. Forcing it past that point before it is fully open can snap the cam tooth.
Whichever applies, follow the same order:
- Stop. Take your hands off and release any pulling load.
- Recheck. Confirm full opening, then locate the catch and hold it for the full movement. Light pressure should be enough.
- Inspect. Look at the plate, lever and pivot for a seated catch, debris or visible damage.
If it still won’t move, check your manual rather than adding force.
Protecting Tabs and Plates While You Work
Once you know what the release is doing, how you hold the helmet matters as much as where you press. Keep your free hand under the visor so its weight never hangs from a single tab or plate. Work one side at a time, finishing the release on that side before you move to the other. If you free one side and then twist the visor against a side that is still locked, the stress lands on the plastic, and that is a common way pieces crack.
Keep screwdrivers away from the plastic. Prying against a plate or tab concentrates force on a small area, which is exactly what these parts are least able to take. If a tool seems necessary, treat that as a signal to stop and recheck the release, not as permission to lever.
Age deserves a moment of thought too. Sliding tabs in particular can turn brittle with age and road salt, so an older helmet, or one ridden on salted roads, calls for slower, lighter handling. If you want a model-specific walkthrough on how to replace helmet shield without breaking tabs, the full guide covers it, and your manual remains the final word on your helmet.
When the Part Is Already Compromised
Sometimes the diagnosis is that something has already failed. If the visor moves freely but never seats firmly, or a release lever no longer springs back, you may be dealing with a damaged part rather than a catch you haven’t found. Look for a cracked or chipped plate, a snapped cam tooth on a ratchet design, a screw that spins without tightening, a missing captive washer behind a screw-fixed plate, or a lever that feels limp. A part that won’t seat or hold properly is a reason to stop and replace it, not to work around it.
At that point, replace rather than repair. A cracked plate may call for replacement helmet base plate side covers rather than another repair attempt. Before ordering, confirm the part is made for your helmet’s exact make, model and year. Fixings and shapes differ between helmets, and your manual or the manufacturer can settle the question.
The same caution applies to tools. If hand removal is not enough, riders can buy visor replacement tool kit options matched to their helmet. Check what a kit is designed for and what your helmet’s fastenings actually require, and never use any tool as a pry bar on the plastic.
Conclusion
A visor that won’t budge is usually telling you the release hasn’t let go. Before adding force, identify the mechanism, confirm the visor is fully open, and check whether the catch is actually disengaged. If it still resists, stop and inspect rather than pull harder. Catches vary by manufacturer, so your owner’s manual is the final word on where yours sits. For model-specific steps once you’ve diagnosed the problem, the full removal guide picks up where this one leaves off.